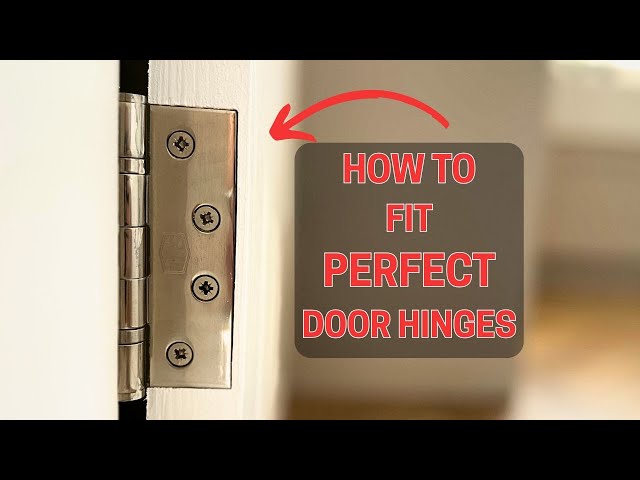
How to Fit Door Hinges: Step-by-Step Guide for Beginners
Are you struggling to hang a door properly? Fitting door hinges might seem tricky, but with the right steps, you can do it yourself quickly and easily.
Imagine opening and closing your door smoothly, without any creaks or gaps. In this guide, you’ll learn simple tricks that make the process clear and stress-free. Keep reading, and you’ll gain the confidence to fit door hinges like a pro, saving time and money on repairs.
Let’s get started!

Credit: www.youtube.com
Tools And Materials Needed
Fitting door hinges requires the right tools and materials. Proper preparation helps the job go smoothly. Using correct equipment ensures the hinges fit well and work properly.
Gathering all necessary items before starting saves time and avoids frustration. Knowing which tools and hinges to use makes the process easier and more accurate.
Essential Tools
- Screwdriver or drill with screwdriver bits
- Chisel for mortising hinge recess
- Hammer or mallet to tap the chisel
- Measuring tape or ruler for precise measurements
- Pencil to mark hinge positions
- Utility knife for fine trimming
- Level to ensure door hangs straight
Choosing The Right Hinges
Select hinges based on door weight and thickness. Standard doors usually need 3-inch or 4-inch hinges.
Heavy doors require stronger, larger hinges to support the weight. Choose hinges made of durable materials like brass or stainless steel for longevity.
Consider the hinge style—mortise hinges fit flush into the door and frame. Surface-mounted hinges are easier to install but less common.

Credit: www.doordigest.com
Preparing The Door And Frame
Preparing the door and frame is a key part of fitting door hinges. This step ensures the door will open and close smoothly. Careful preparation also helps avoid damage to the door or frame during installation. Proper measuring and marking set a strong foundation for the hinge placement. This preparation leads to a neat and secure fit of the door.
Measuring For Hinge Placement
Start by measuring where the hinges will sit on the door and frame. Most doors use two or three hinges spaced evenly. A common practice is to place one hinge 7 inches from the top edge. Another hinge goes 11 inches from the bottom edge. If a third hinge is needed, center it between the top and bottom hinges.
Use a tape measure for accuracy. Mark these measurements clearly on the edge of the door and the door frame. Consistent spacing ensures the door stays balanced and opens properly.
Marking Hinge Positions
Marking the exact position of each hinge is crucial before cutting. Align the hinge against the door edge at the measured marks. Use a pencil to trace around the hinge plate. Do the same on the door frame at the matching points.
Check that the hinge markings on the door and frame line up perfectly. Adjust if needed. Clear and accurate marks make chiseling the hinge recess easier. This step prevents uneven fitting and door misalignment.
Cutting Hinge Mortises
Cutting hinge mortises is a crucial step in fitting door hinges accurately. It ensures the hinge sits flush with the door and frame, allowing smooth movement without gaps or binding. Getting this part right can save you from common door alignment headaches later.
Using A Chisel And Router
You can cut hinge mortises with either a chisel or a router, depending on the tools you have and your comfort level. A sharp chisel gives you control but requires patience and steady hands. I once underestimated this step and rushed with a dull chisel—resulting in uneven edges that made the hinge sit crooked.
Using a router speeds up the process and can create cleaner cuts. Set a guide or template to keep your cuts straight and consistent. However, if you’re new to routers, practice on scrap wood first to avoid cutting too deep or off-angle.
- Mark the hinge outline carefully on the door edge.
- Remove thin layers gradually rather than trying to cut the full depth at once.
- Check frequently by placing the hinge in the mortise to test the fit.
Achieving Precise Depth
Depth precision is key for a snug hinge fit. Too shallow, and the hinge won’t sit flush; too deep, and the door loses strength and the hinge may wobble. I recommend measuring the hinge thickness with calipers or a ruler before starting.
Set your router bit depth or mark the chisel cutting depth clearly on your tool. Use a depth stop or tape on your chisel to prevent going too far. Always double-check by inserting the hinge and closing it to see if it aligns properly.
- Use a marking gauge or pencil to outline the exact mortise depth.
- Remove material in small increments, testing frequently.
- Finish by smoothing edges with sandpaper for a clean fit.
Have you ever struggled with a door that sticks or doesn’t close properly? Often, it’s because the hinge mortises weren’t cut to the right depth or shape. Taking your time here makes all the difference in door performance.

Credit: www.morehandles.co.uk
Attaching Hinges To The Door
Attaching hinges to the door is a key part of fitting door hinges. This step ensures the door moves smoothly and stays aligned. Proper attachment avoids future problems like sagging or misalignment.
Use the right tools and take your time during this process. Precision here saves effort later. Follow these tips for a secure and neat hinge fit.
Aligning Hinges Properly
Place the hinge on the door edge where marks were made. The hinge leaf should sit flush with the door surface. Check that the hinge knuckle is straight and not tilted.
Use a pencil to mark screw holes clearly. Ensure the hinge is vertical and matches the door frame hinge position. Double-check alignment before drilling or screwing.
Securing Screws
Choose screws that fit the hinge holes perfectly. Insert screws one at a time, starting with the top screw. Tighten each screw firmly but do not over-tighten to avoid stripping the wood.
Make sure the hinge remains steady during screwing. If screws feel loose, use slightly larger screws or wood filler. Secure all screws to hold the hinge tightly in place.
Mounting The Door On The Frame
Mounting the door on the frame is a crucial part of fitting door hinges. It sets the foundation for smooth operation and perfect alignment. Getting this right prevents future issues like sticking or gaps between the door and frame.
Holding The Door In Place
Before you fix the hinges, you need to hold the door steady in the exact position it will hang. This can be tricky if you’re working alone, but a good pair of clamps or a helper makes a big difference.
Try using a stack of books or a sturdy box to support the door at the right height. Make sure the door is flush with the frame and opens in the right direction. Check that the gap between the door and frame is even all around.
Have you noticed how even a slight misalignment here can cause the door to rub or not close properly? Taking your time now saves frustration later.
Fixing Hinges To The Frame
Once the door is held securely, it’s time to attach the hinges to the frame. Align the hinge plates carefully with the marks you made earlier. Use a level to ensure they are perfectly vertical.
Start by screwing in one or two screws on each hinge just enough to hold it in place. Then open and close the door gently to test the fit. This way, you can adjust the hinge position slightly before fully tightening all screws.
Use screws that are long enough to grip the frame firmly, but not so long that they come out the other side. If your frame is hollow, consider using wall anchors for extra strength. How often do you check hinge screws for tightness? It’s a small step that can prevent sagging over time.
Testing And Adjusting The Door
Testing and adjusting the door after fitting hinges is crucial to ensure smooth operation and proper fit. It’s easy to overlook small misalignments that can cause the door to stick or swing unevenly. Taking time to carefully check and tweak the door now saves frustration and extra work later.
Checking Alignment And Swing
Start by closing the door slowly. Watch if the door fits evenly within the frame or if gaps appear unevenly at the top, bottom, or sides. A well-aligned door should have consistent spacing all around.
Next, observe how the door swings. Does it move smoothly without sticking or dragging on the frame? Does it stay open when pushed or does it swing shut on its own? These simple tests show whether the hinges are positioned correctly.
Try pushing the door gently at different points to detect any wobble or resistance. Even a slight misalignment can cause issues over time. Have you noticed your door rub against the frame or floor? That’s a sign the hinges need adjustment.
Making Necessary Adjustments
If you spot any problems, don’t worry. Most hinge issues can be fixed by loosening screws and shifting the hinge slightly. Use a screwdriver to adjust one hinge at a time, then retest the door’s movement.
Sometimes, tightening or loosening the hinge screws changes the door’s position just enough to fix a rubbing spot. If the door swings open or closed too easily, consider adding or removing a shim behind the hinge leaf to adjust the angle.
Keep testing after each small adjustment. It might take a few tries to get the door perfectly aligned, but the process is straightforward. Remember, patience here means your door will work flawlessly for years.
Common Mistakes To Avoid
Fitting door hinges seems simple but often involves common errors. Avoiding these mistakes saves time and ensures smooth door operation. Knowing what to watch for helps achieve a perfect hinge fit.
Misaligned Hinges
Misalignment is a frequent problem. Hinges must line up exactly on both the door and frame. If not, the door may not close properly or may rub against the frame.
Check the hinge placement carefully before fixing screws. Use a level or square tool to ensure straight lines. Mark the spots clearly and measure twice to avoid errors. Small misalignments cause big problems in door function.
Improper Screw Installation
Using the wrong screws or installing them poorly weakens the hinge hold. Screws that are too short or thin do not support the door weight well.
Drive screws straight into the wood to prevent stripping or loosening. Tighten screws firmly but avoid over-tightening, which can damage the hinge or door.
Choose screws that match hinge holes and wood type. Always replace missing or damaged screws immediately for safety and stability.
Maintenance Tips For Door Hinges
Proper maintenance keeps door hinges working smoothly and quietly. Simple care prevents squeaks and prolongs hinge life. Regular checks make sure doors open and close properly.
Lubrication
Apply lubricant to the hinge pins and joints. Use light oil or silicone spray for best results. Avoid thick grease that can attract dust and dirt. Lubricate every few months or when hinges start to squeak. Wipe off any excess oil to keep the area clean.
Tightening Screws Regularly
Check all hinge screws often. Loose screws cause door misalignment and noise. Use a screwdriver to tighten screws until they are snug. Replace any damaged or stripped screws with new ones. Tight screws ensure the door stays secure and operates well.
Frequently Asked Questions
How Do I Measure Door Hinges Correctly?
Measure the hinge height and width using a ruler or tape. Note the thickness and pin size for proper fit. Accurate measurement ensures the new hinge matches the door and frame perfectly.
What Tools Are Needed To Fit Door Hinges?
You need a screwdriver, chisel, hammer, drill, and measuring tape. These tools help remove old hinges, mark positions, and fix new hinges securely.
How Do I Align Door Hinges For Smooth Operation?
Align hinges by marking exact positions on the door and frame. Use a level to keep hinges straight. Proper alignment prevents door sagging and ensures smooth opening.
Can I Fit Door Hinges Without Removing The Door?
Yes, you can fit hinges on a door in place. Support the door properly to avoid damage. This method saves time and effort during installation.
Conclusion
Fitting door hinges takes care and patience. Follow each step slowly and carefully. Use the right tools to make the job easier. Check the hinge fits well before fixing all screws. A properly installed hinge helps your door open and close smoothly.
Practice makes perfect, so don’t rush. Small mistakes can cause big problems later. Take your time and enjoy the process. Soon, you will have a door that works like new. Simple steps lead to good results.