How to Connect Pex Pipe to Fittings: Expert Tips & Tricks
Are you ready to tackle your plumbing project but unsure how to connect PEX pipe to fittings? You’re not alone.
Many DIYers find this step tricky, but once you know the right method, it becomes quick and simple. Connecting PEX pipes correctly ensures a leak-free, strong connection that lasts for years. In this guide, you’ll discover easy-to-follow tips and tricks to make your plumbing job smooth and stress-free.
Keep reading, and you’ll gain the confidence to handle your PEX piping like a pro.
Credit: blog.boshart.com
Types Of Pex Pipes
Understanding the different types of PEX pipes is key to making the right connection with fittings. Each type offers distinct flexibility, strength, and suitability for various plumbing needs. Knowing these differences helps you avoid leaks and ensures a lasting installation.
Pex-a
PEX-A is the most flexible variety, made through the peroxide method. This flexibility makes it easier to bend around corners without fittings, saving time and money. It also has excellent resistance to kinking and can be repaired if crushed, which is a big advantage on tight jobs.
Pex-b
PEX-B is created using the silane method and tends to be stiffer than PEX-A. It’s generally more affordable and has good resistance to chlorine, making it a solid choice for potable water systems. However, its lower flexibility means you might need more fittings, which can increase installation time.
Pex-c Variants
PEX-C is produced via the electron beam method and sits between PEX-A and PEX-B in terms of flexibility and durability. While less common, it’s still a reliable option for specific plumbing applications. Its moderate cost and balanced properties can be useful depending on your project’s needs.
Choosing The Right Pipe For Your Project
Ask yourself: Is flexibility or cost more important for your job? For tight spaces, PEX-A’s bendability often wins. If you’re on a budget and can handle more fittings, PEX-B might work better.
Consider the water quality too. If chlorine levels are high, PEX-B’s resistance could prevent premature pipe damage. Think about your comfort with tools and repairs—PEX-A’s kink recovery can save headaches if mistakes happen.
Choosing the right PEX pipe means balancing price, flexibility, and durability to fit your specific project. How will you decide which factor matters most for your plumbing setup?
Common Pex Fittings
Choosing the right PEX fittings makes a big difference in how secure and leak-free your plumbing connections will be. Each type of fitting has its own tools and techniques, which can change how easy or tricky the job feels. Knowing the options helps you pick what fits your skills and the tools you have on hand.
Crimp Fittings
Crimp fittings use a copper ring that you squeeze tightly around the PEX pipe with a special crimping tool. The ring compresses the pipe onto the fitting, creating a solid seal.
One thing I noticed is that crimping feels very reliable once you get the hang of the tool. Just be sure to measure twice and cut once; a poorly cut pipe end can lead to leaks even if the crimp is perfect.
These fittings are great if you want a strong connection and don’t mind investing in a crimp tool. Plus, the copper rings are reusable if you need to redo the connection.
Clamp (cinching) Fittings
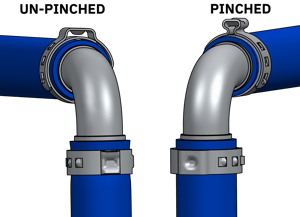
Clamp fittings use stainless steel rings that you tighten with a cinch or clamp tool. The clamp squeezes the ring, which holds the pipe tightly against the fitting.
Compared to crimp rings, clamps are easier to install because the tool requires less force. I found that clamps work well in tight spaces where maneuvering a crimp tool is tough.
They offer a solid hold and are a bit more forgiving if your pipe cutting isn’t perfectly straight. If you want a quick, secure fit without special skills, clamps are worth considering.
Push-fit Fittings
Push-fit fittings don’t need any tools or rings. You just push the PEX pipe into the fitting, and internal teeth grip the pipe to form a seal.
This style is incredibly beginner-friendly and fast. I’ve used push-fit fittings during emergency repairs when I didn’t have my tools handy.
They’re ideal if you want a no-fuss solution or expect to remove and reuse fittings later. However, they tend to be pricier, so keep that in mind for larger projects.
Tools Needed For Connection
Connecting PEX pipe to fittings requires specific tools for a secure and leak-free joint. Each tool plays a unique role in preparing and fastening the pipe. Using the right tools ensures a strong connection that lasts.
Choosing tools that fit your PEX system type is important. Some systems need crimping, others use clamps or expansion methods. Understanding these tools helps you work efficiently and avoid mistakes.
Crimping Tools
Crimping tools compress metal rings around the PEX pipe and fitting. This creates a tight seal to prevent leaks. These tools are simple to use and provide a reliable connection. They come in manual and powered versions for different project sizes.
Clamp Tools
Clamp tools tighten stainless steel rings around the pipe and fitting. This method offers a strong, secure hold. Clamp tools are easy to operate and provide consistent pressure. They are ideal for both DIY and professional plumbing jobs.
Cutters And Expanding Tools
Cutters make clean, straight cuts on PEX pipe for a perfect fit. Expanding tools stretch the pipe end to fit over the fitting smoothly. This method requires precise control to avoid damaging the pipe. Both tools are essential for expansion-style PEX systems.
Preparing The Pex Pipe
Getting your PEX pipe ready before connecting it to fittings is crucial for a secure and leak-free plumbing job. Proper preparation ensures that the pipe fits perfectly and the connection holds tight over time. Skipping or rushing this step often leads to leaks and costly repairs later.
Cutting The Pipe Correctly
Use a sharp PEX pipe cutter designed specifically for this material. Avoid using regular saws or scissors—they can crush or deform the pipe, making it harder to connect fittings properly.
Cut the pipe straight across, not at an angle. A clean, square cut helps the fitting slide on evenly and form a tight seal.
Hold the pipe firmly while cutting to prevent it from bending or cracking. Have you noticed how a crooked cut makes insertion frustrating? Keeping cuts precise saves you time and headaches.
Deburring And Cleaning Ends
After cutting, check the pipe ends for burrs or rough edges. These tiny imperfections can damage fittings or cause leaks.
Use a deburring tool or a utility knife to smooth the edges gently. Be careful not to cut too deep—just enough to remove any jagged bits.
Clean the pipe ends with a cloth to remove any dirt, oil, or debris. Even small particles can interfere with the connection’s seal.
Imagine how frustrating it would be to finish your plumbing only to find a leak because of a tiny speck you missed. Taking a few extra minutes here pays off big time.
Connecting With Crimp Fittings
Connecting PEX pipe to fittings using crimp fittings is a reliable and widely used technique. It provides a strong, watertight seal that holds up under pressure. Understanding the proper way to use crimp fittings ensures your plumbing project stays leak-free and durable.
Sliding The Crimp Ring
Start by sliding the crimp ring onto the end of the PEX pipe. Make sure the ring is positioned about 1/8 to 1/4 inch from the pipe’s end. This spacing allows enough room for the fitting to be inserted without pushing the ring off.
Keep the ring steady as you prepare to insert the fitting. If the ring slips or is too close to the edge, the connection might not hold properly. A little patience here saves you from leaks later.
Inserting The Fitting
Next, insert the fitting fully into the PEX pipe. Push it until it reaches the pipe’s stop mark or the pipe end, ensuring a tight fit. You should feel a slight resistance as the pipe slides over the fitting barbs, confirming it’s seated correctly.
Double-check that the fitting is straight and not angled. An angled fitting can cause an uneven crimp, leading to weak points. Have you ever tried to force a fitting in crooked? It’s a quick way to ruin the connection.
Crimping Steps
Position the crimping tool jaws over the crimp ring, making sure the tool is perpendicular to the pipe. Squeeze the handles firmly until the tool completes the crimp cycle. A properly crimped ring should be evenly compressed around the pipe.
After crimping, use a go/no-go gauge to test the ring’s tightness. This simple step confirms if the connection meets specifications. Skipping this check is like driving without fastening your seatbelt—why risk it?

Credit: www.aquorwatersystems.com
Using Clamp Fittings
Using clamp fittings is a simple and reliable way to connect PEX pipes to fittings. Clamp fittings create a strong seal by compressing a metal ring around the pipe and fitting. This method requires specific tools but offers a secure connection without glue or solder.
Positioning The Clamp Ring
Slide the clamp ring over the PEX pipe end. Push the pipe fully onto the fitting until it stops. Move the clamp ring to sit evenly over the fitting’s barbs. The ring must cover the entire barb area for a tight seal.
Securing The Clamp
Use a clamp tool to tighten the ring. Place the tool’s jaws around the clamp ring. Squeeze the handles firmly until the ring is compressed. Avoid overtightening, as it can damage the pipe or fitting.
Checking The Connection
Inspect the clamp ring for uniform compression. The ring should sit flush against the pipe without gaps. Gently tug the pipe to test its hold. A proper connection will not pull off easily.
Push-fit Connection Method
The push-fit connection method is a simple and quick way to join PEX pipes to fittings. It requires no special tools or soldering. This method uses a fitting with an internal ring and a rubber O-ring. These parts hold the pipe tightly and prevent leaks. It is popular for DIY projects and professional plumbing alike. The connection is strong and reliable if done correctly.
Inserting The Pipe
Start by cutting the PEX pipe cleanly and squarely. Use a proper pipe cutter for a neat edge. Remove any burrs or rough spots with a deburring tool. Push the pipe firmly into the fitting. You will feel resistance from the O-ring. Keep pushing until the pipe reaches the internal stop inside the fitting. This ensures the pipe is fully seated.
Ensuring A Secure Fit
Check the pipe is pushed all the way in. Pull gently to confirm it does not come out. The fitting’s teeth grip the pipe tightly. Make sure there is no visible gap between pipe and fitting. If available, use a go/no-go gauge to verify the connection depth. Test the joint by turning the pipe slightly. A secure fit will not move or leak under pressure.
Testing For Leaks
Testing for leaks is a crucial step after connecting Pex pipe to fittings. It ensures your plumbing system works properly and prevents water damage. This process helps find small leaks that are not visible to the eye. Early detection saves time, money, and headaches.
Pressure Testing Techniques
Pressure testing checks the strength of your Pex pipe connections. Use a pressure gauge to monitor water pressure inside the pipes. Fill the system with water or air, then close all valves tightly. Watch the pressure for 10-15 minutes.
- If pressure stays steady, connections are secure.
- If pressure drops, a leak exists somewhere.
Use a hand pump or air compressor for air testing. Water pressure tests are safer and easier for beginners. Always follow manufacturer guidelines for maximum pressure limits.
Identifying And Fixing Leaks
Locate leaks by carefully inspecting all fittings and pipe joints. Look for water drips, wet spots, or corrosion. Use soapy water on connections; bubbles show escaping air or water.
Fix leaks by tightening loose fittings or replacing damaged parts. Cut out and replace any cracked or bent pipe sections. Use proper tools and fittings to avoid future leaks. Test again after repairs to confirm the fix.
Maintenance Tips
Maintaining your PEX pipe connections is essential to prevent leaks and ensure a long-lasting plumbing system. Paying attention to small signs of wear can save you from costly repairs later. Let’s look at practical ways you can keep your PEX fittings in top shape.
Inspecting Connections Regularly
Make it a habit to check your PEX connections every few months. Look for any signs of moisture, corrosion, or loose fittings. Even a tiny drip can cause damage over time if left unnoticed.
Use a flashlight to get a clear view of hard-to-see areas. Gently tug on the pipes to ensure they’re firmly attached. If you spot any discoloration or rust around the fittings, it’s a warning sign you shouldn’t ignore.
Replacing Damaged Sections
If you find a cracked or worn-out section of your PEX pipe, don’t hesitate to replace it immediately. Damaged pipes can cause leaks that might go unnoticed until significant water damage occurs.
Cut out the faulty section with a proper PEX cutter and fit a new piece using the correct fittings. Always double-check your connections after replacement to make sure they’re secure.
Have you ever delayed fixing a small leak only to deal with a bigger problem later? Taking quick action on damaged parts saves both time and money.

Credit: www.pmmag.com
Frequently Asked Questions
How Do You Connect Pex Pipe To Fittings?
To connect PEX pipe to fittings, slide a crimp ring over the pipe end. Insert the fitting fully, then use a crimp tool to secure the ring. Ensure a tight, leak-free connection by checking the crimp with a gauge.
What Tools Are Needed For Pex Pipe Connections?
You need a PEX crimp tool, crimp rings, a pipe cutter, and fittings. These tools ensure clean cuts and secure connections. Using the right tools prevents leaks and pipe damage, ensuring a durable plumbing system.
Can Pex Pipe Be Connected Without Clamps?
No, PEX pipe connections require clamps or crimp rings for secure fittings. These ensure a tight seal and prevent leaks. Using clamps or rings is essential for maintaining system integrity and complying with plumbing codes.
How To Avoid Leaks When Connecting Pex Pipes?
Use the correct size fittings and crimp rings. Cut pipes cleanly and insert fittings fully. Check crimps with a gauge and ensure no damage to pipes. Proper technique and tools prevent leaks effectively.
Conclusion
Connecting Pex pipe to fittings is simple with the right tools. Clean the pipe ends well before attaching fittings. Push the pipe fully into the fitting for a tight seal. Use a clamp or crimp tool to secure connections firmly.
Check each joint to avoid leaks. Practice makes the process easier and faster. With these steps, your plumbing will work smoothly and last longer. Keep your tools handy for future repairs or updates. Confidence grows with every successful connection you make.