How to Fit Kitchen Sink: Easy Steps for a Perfect Installation
Are you ready to upgrade your kitchen with a new sink but worried about the installation? Fitting a kitchen sink might seem tricky, but with the right steps, you can do it yourself and save time and money.
Imagine the satisfaction of seeing your new sink perfectly in place, working just as you hoped. In this guide, you’ll find clear, simple instructions that make the process easy to follow. By the end, you’ll have the confidence to tackle this task without stress.
Keep reading, and let’s get your kitchen sink fitted right!
Credit: medium.com
Choosing The Right Sink
Choosing the right kitchen sink is more than just picking a pretty design. It affects how you work in your kitchen every day. The right sink fits your space, matches your style, and meets your practical needs.
Types Of Kitchen Sinks
There are several types of kitchen sinks, each suited for different kitchen styles and tasks. The most common are:
- Top-mount sinks:These sinks drop into a hole in the countertop. They are easier to install and often budget-friendly.
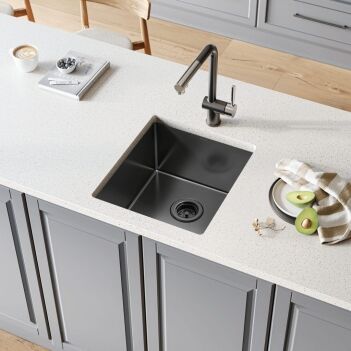
- Undermount sinks:These are mounted below the countertop, giving a sleek, seamless look and making cleaning easier.
- Farmhouse sinks:Also called apron-front sinks, they have a deep basin and exposed front, perfect for heavy-duty use and adding character.
- Integrated sinks:These are part of the countertop material, offering a smooth, modern appearance without seams.
Ask yourself: How do you use your sink? Do you need a large basin for washing big pots, or something compact for a small kitchen?
Material Considerations
The sink’s material affects its durability, appearance, and maintenance. Popular options include:
| Material | Pros | Cons |
|---|---|---|
| Stainless Steel | Durable, easy to clean, affordable | Can scratch and dent, noisy |
| Cast Iron | Strong, classic look, scratch-resistant | Heavy, requires sturdy support, can chip |
| Composite Granite | Heat and scratch resistant, stylish | Can be expensive, may fade over time |
| Ceramic | Beautiful finish, easy to clean | Prone to chipping and cracking |
Think about how much maintenance you’re willing to do. If you want low upkeep, stainless steel or composite might be better for you.
Size And Dimensions
Choosing a sink size that fits your kitchen layout and workflow is critical. Measure your countertop space carefully and consider your cabinet size underneath.
Here are some tips to guide your decision:
- Make sure the sink doesn’t overwhelm the counter or leave too little workspace.
- Consider the depth; deeper sinks hold more but may strain your back during use.
- Think about the number of bowls—single bowls are great for large pots, while double bowls help separate tasks like washing and rinsing.
Have you ever struggled with a sink that was too small or too big? Finding the right balance will make your kitchen much more comfortable.
Tools And Materials Needed
Before you start fitting your kitchen sink, gathering the right tools and materials will save you time and frustration. Having everything at hand ensures a smooth installation and helps you avoid unexpected trips to the hardware store. Let’s break down exactly what you need to get this job done efficiently.
Essential Tools
- Adjustable wrench:Perfect for tightening plumbing connections without damaging fittings.
- Pipe wrench:Provides extra grip for stubborn pipes and fittings.
- Plumber’s putty or silicone sealant:Helps create watertight seals around the sink edges and drain.
- Screwdriver set:Both flathead and Phillips screwdrivers are necessary for various fasteners.
- Measuring tape:To ensure your sink fits perfectly in the countertop cutout.
- Jigsaw or hole saw:If you need to cut a new hole in your countertop for the sink or faucet.
- Bucket and towels:Essential for catching any water spills and cleaning up.
Have you ever tried to fix plumbing without the right wrench? It’s frustrating and can damage your pipes. Getting the correct tools upfront makes your job easier and protects your kitchen fixtures.
Required Materials
- Kitchen sink unit:Choose a sink that fits your countertop and kitchen style.
- Faucet:Select a faucet compatible with your sink’s holes and plumbing setup.
- Drain assembly:This includes the drain flange, gasket, and tailpiece to connect to your plumbing.
- Plumber’s tape (Teflon tape):Wrap this around threaded pipe connections to prevent leaks.
- Mounting clips and brackets:These secure the sink firmly to the countertop.
- Supply lines:Flexible hoses that connect your faucet to the water valves.
Do you know the difference between plumber’s putty and silicone sealant? Using the right sealant in the right place prevents leaks and keeps your sink looking neat. Planning your materials carefully helps avoid last-minute surprises and ensures a long-lasting installation.
Preparing The Workspace
Preparing the workspace is a crucial step before fitting a kitchen sink. A clean and organized area helps the installation go smoothly. It also reduces the risk of accidents and damage. Taking time to prepare sets a good foundation for the task ahead.
Clearing The Area
Remove all items from the countertop and under the sink. Clear away dishes, cleaning products, and any small appliances. This creates enough room to work comfortably. Wipe down surfaces to remove dirt and grime. A tidy workspace prevents tools and parts from getting lost.
Safety Precautions
Wear gloves to protect your hands from sharp edges. Use safety glasses to shield your eyes from debris. Turn off the water supply before starting any plumbing work. Make sure the power is off if you will work near electrical outlets. Keep tools organized and within reach to avoid accidents.
Removing The Old Sink
Removing the old kitchen sink might seem like a daunting task, but breaking it down into manageable steps makes the process smoother. Before you get started, make sure you have the right tools handy and the water supply turned off. Taking your time here can save you a lot of hassle later on.
Disconnecting Plumbing
First, disconnect the plumbing connected to your sink. This includes the water supply lines and the drain pipes.
- Locate the shut-off valves under the sink and turn them off.
- Use a wrench to loosen the nuts on the water supply lines carefully.
- Place a bucket under the drain trap to catch any leftover water before loosening the drain connections.
Have you ever been surprised by water spilling out during this step? It’s a common mistake to skip the bucket, so don’t let it happen to you!
Removing Fasteners
Once the plumbing is disconnected, focus on the fasteners holding the sink in place. These might be clips, screws, or brackets depending on your sink type.
- Look under the countertop to find these fasteners.
- Use a screwdriver or a wrench to loosen and remove them.
- If the sink is sealed with caulk, gently cut through the seal with a utility knife to avoid damaging the countertop.
Sometimes, fasteners can be rusty or stuck tight. Applying a little lubricant can make removal easier and prevent damage.
Have you noticed how taking off the old sink gives you a new perspective on your kitchen’s layout? It’s the perfect chance to think about improvements before fitting the new one.
Installing The New Sink
Installing the new kitchen sink is a crucial moment in your kitchen upgrade. This stage requires precision and patience to ensure a perfect fit and prevent leaks. Let’s dive into the details that make the installation smooth and secure.
Positioning The Sink
Start by carefully lowering the sink into the countertop cutout. Make sure the sink edges align perfectly with the counter surface. Take a moment to check if the sink sits flat without rocking or gaps.
Does the sink overlap the countertop evenly on all sides? This is key to achieving a clean look and proper seal. If the sink moves too much, adjust the cutout or check for debris underneath. You want the sink to rest firmly before moving to the next step.
Securing With Fasteners
Once positioned, it’s time to secure the sink using the fasteners provided. These are usually clips or brackets that clamp the sink to the underside of the countertop.
Tighten each fastener evenly to avoid warping the sink rim. Don’t over-tighten, as this can damage the countertop or sink. If you’re using clips, make sure they are spaced evenly around the sink perimeter for balanced support.
- Check that all fasteners are snug and the sink doesn’t shift.
- Use a screwdriver or wrench suitable for the fasteners to avoid stripping.
- Inspect the sealant around the edges to confirm no gaps remain.
Securing the sink well prevents water damage and gives you peace of mind. Have you ever had a sink that moved or leaked after installation? Taking your time here saves you from costly repairs later.
:strip_icc()/kitchen-bamboo-countertops-colored-cabinets-sink-3FyjOiKM4fP95cPOHZJR-P-15f5f0dfef9945b9af9c121b0a7aad6e.jpg)
Credit: www.bhg.com
Connecting Plumbing
Connecting the plumbing is a key step in fitting a kitchen sink. It involves joining the sink’s drain to the home’s water and waste systems. Proper connections ensure smooth water flow and prevent leaks. This part requires careful attention and the right tools. Follow simple steps to make secure and lasting plumbing links.
Attaching Pipes
Start by positioning the drain pipes correctly under the sink. Use a pipe wrench to tighten slip nuts by hand, then give a slight turn for a snug fit. Align pipes carefully to avoid strain or bending. Connect the trap to the drain outlet and the waste pipe. Ensure all pipes fit together without gaps.
Ensuring Leak-free Connections
Apply plumber’s tape or pipe sealant to threads before assembling. Check all joints for tightness but avoid over-tightening. Run water through the sink and watch for drips. Tighten any loose fittings gently. Use a cloth to wipe excess sealant or water. A leak-free connection protects cabinets and floors from damage.
Sealing And Finishing
Sealing and finishing your kitchen sink installation ensures it stays water-tight and looks neat. Proper sealing stops water from leaking under the sink. Finishing touches protect surfaces and keep the sink area clean.
Applying Sealant
Choose a high-quality silicone sealant made for kitchens. Apply a smooth, even bead of sealant around the sink edge where it meets the countertop. Use a wet finger or a sealant tool to press the sealant firmly into the gap. Remove any excess sealant immediately for a clean finish. Let the sealant dry fully before using the sink to prevent water damage.
Cleaning And Polishing
Wipe away dust and dirt from the sink and countertop after sealing. Use a soft cloth with mild soap and water for cleaning. Dry the area thoroughly to avoid water spots. Polish stainless steel sinks with a non-abrasive cleaner to restore shine. Regular cleaning keeps your sink looking fresh and prevents stains or rust.
Troubleshooting Common Issues
Troubleshooting common issues during kitchen sink installation can save time and prevent damage. Many problems arise from small mistakes or overlooked steps. Understanding these issues helps fix them quickly and keeps your sink working well.
Leaks and drainage problems are the most frequent concerns. Both affect sink performance and can cause water damage. Fixing them early avoids costly repairs and keeps your kitchen safe.
Fixing Leaks
Leaks often come from loose connections or damaged seals. Check all pipe joints and faucet fittings for tightness. Use plumber’s tape on threaded connections to ensure a good seal.
- Inspect the sink drain assembly and tighten any loose nuts.
- Replace worn-out washers or gaskets inside the faucet.
- Apply silicone sealant around the sink rim to stop water from seeping underneath.
Leaks under the sink can also come from cracked pipes. Replace damaged sections promptly. Always turn off the water supply before making repairs.
Addressing Drainage Problems
Slow or clogged drainage causes water to pool in the sink. Remove the drain cover and clean out any debris. Use a plunger carefully to clear minor clogs.
- Check the P-trap for blockages and clean it regularly.
- Ensure the drain pipes are properly aligned and not kinked.
- Use a drain snake for stubborn clogs deep in the pipes.
Proper slope in the drain pipes is essential. Pipes should angle downward to allow water to flow freely. Adjust pipe positions if water drains too slowly or backs up.
Maintenance Tips
Keeping your kitchen sink in top shape doesn’t end with just fitting it properly. Regular maintenance plays a crucial role in extending its lifespan and keeping it looking fresh. Let’s dive into some practical maintenance tips that make a real difference over time.
Regular Cleaning
Clean your sink daily to prevent grime buildup. Use a mild dish soap and a soft sponge to wipe down the surface. Avoid harsh chemicals that can damage the finish or clog drains.
For stainless steel sinks, a sprinkle of baking soda followed by gentle scrubbing helps remove stains without scratching. Rinse thoroughly and dry with a cloth to prevent water spots.
Have you noticed a lingering smell? Pouring a mixture of baking soda and vinegar down the drain can freshen things up naturally. Let it fizz for a few minutes before rinsing with hot water.
Preventative Measures
Consider installing a sink strainer to catch food particles and prevent clogs. It’s a simple tool that saves you from costly plumbing issues later.
Be mindful of what you let go down the drain. Avoid grease, coffee grounds, and fibrous foods as they tend to stick and cause blockages.
Check your sink’s seal and faucet connections regularly. Tighten any loose fittings to stop leaks early. Have you ever found a leak only after water damage occurred? Catching it early saves you hassle and money.

Credit: www.kingstonbrass.com
Frequently Asked Questions
How Do I Measure For A Kitchen Sink?
Measure the cabinet opening width and length accurately. Check the sink’s dimensions and ensure it fits well. Also, measure the countertop thickness for installation compatibility. Accurate measurements prevent fitting issues and help choose the right sink size.
What Tools Are Needed To Fit A Kitchen Sink?
You need a wrench, screwdriver, plumber’s putty, silicone sealant, and a tape measure. A utility knife and adjustable pliers are also helpful. These tools ensure a secure, leak-free installation of your kitchen sink.
How To Seal A Kitchen Sink Properly?
Apply a bead of silicone sealant around the sink edge. Press the sink firmly into place. Wipe away excess sealant immediately. This prevents water leaks and protects your countertop from damage.
Can I Install A Kitchen Sink Myself?
Yes, with basic plumbing and DIY skills, you can install a kitchen sink. Follow step-by-step instructions carefully. Turn off water supply before starting. If unsure, consult a professional to avoid costly mistakes.
Conclusion
Fitting a kitchen sink can be a simple task with clear steps. Take your time to measure and cut carefully. Use the right tools to avoid mistakes. Secure the sink firmly to prevent leaks. Check all connections before finishing the job.
A well-installed sink makes your kitchen work easier. Practice helps build confidence for future projects. Keep safety in mind throughout the process. Enjoy your new sink and the fresh look it brings.